Website

Please check out my website:

www.jdmstudios.com

Monday, May 23, 2011

Trees for Life Charity Exhibition

I'd like to tell you all about an amazing charity project by Trevor Jones.  Trevor is an amazingly talented artist who is originally from Canada and currently living in Edinburgh, Scotland.  He has a passion for trees that can be seen in his artwork and this passion is what has set the stage for his latest and greatest project.  


"It really is unsettling to know that over half the world’s forests have been destroyed by humans and as I mentioned in my blog only 1% of the original Caledonian forests in Scotland are left today. That’s really depressing and quite scary!" Trevor Jones


We all know the importance of trees.  Not only are the beautiful and give a sense of peace and joy, they are also play a major role in controlling the Earth's weather patterns.  Here is an interesting top 10 list I found of the top ten reasons why we need trees from Lungs of the Earth at 


Top 10 Reasons We Need Trees


Source: USDA Forest Service


1. Trees help purify the air we breathe by absorbing pollutants.

2. Trees increase property values and improve the tax base in communities.

3. Trees improve neighborhood appeal, attract businesses, shoppers and homeowners.

4. Trees cool our cities and towns by reducing heat generated by buildings and paved surfaces.

5. Tree shade, properly placed, can save an average household up to $250 annually in energy costs.

6. Trees reduce the amount of pollutants in sewer systems, saving communities millions of dollars in water treatment costs.

7. Trees soften harsh building lines and large expanses of pavement, making urban environments much more pleasant.

8. Trees provide habitat for birds and other wildlife, maintaining a balance with nature even in urban areas.

9. Trees reduce the amount of water-borne pollutants that reach streams and rivers.

10. Trees reduce levels of domestic violence and foster safer, more sociable neighborhood environments.


There is a sense of urgency needed to address this situation.  The United Nations and the scientific community both recognize this, 
which is the key reason why 2011 has been declared the International Year of Forests.


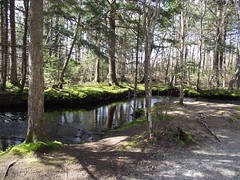
Baille Ard Trails, May 2011
Trevor says his original thought was to donate a percentage of sales of the artwork to Trees for Life (a fantastic charity supporting the growth of the Caledonian Forest).  After more thought he realized he could make much more impact for his cause with the help of social media Twitter and Facebook.


He has asked artists from Twitter and Facebook to donate a piece of artwork, preferably of a nature inspired theme. The size must be approximately 6 x 9 inches (postcard size).  Each piece will sell for £45.  Trevor will have them professionally card mounted and backed. 


The exhibition and sale will occur November 1-13.  Paintings must be submitted by July 31.


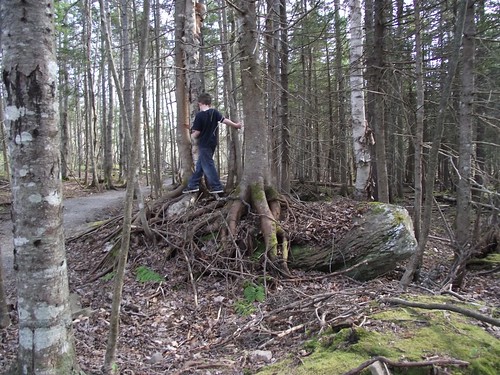
    Trees can be extremely tenacious!  Check out these roots!
    This event has quickly grown into a huge international event with over 100 artists from 15 different countries participating!


    I am thrilled to be participating in this event.  Not only is it exciting to participate in an international event, it is an absolutely fantastic cause.  


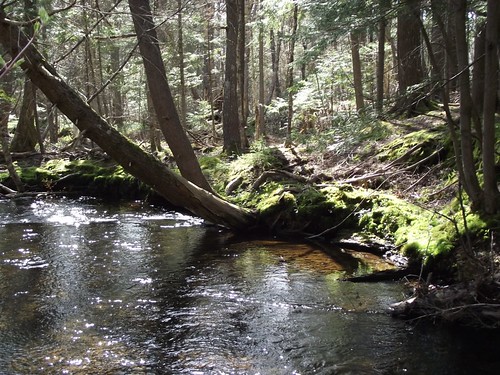
    Enjoying some family time in the woods
    I have been totally focussed on finishing my print order, and I should have it finished this week...woo hoo!    I've been painting in my head even though I haven't been able to get my thoughts on paper just yet.  I have so many mental images I am working through right now. I absolutely cannot wait to begin working on this project!  I'll have to get it finished and mailed by early June, I figure, to make the July 31 deadline.  That will be another post!


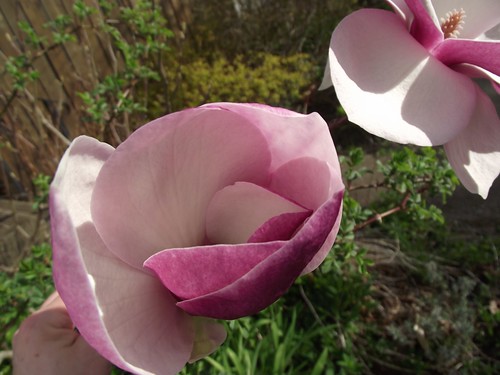
    My Magnolia Tree bloomed!


    If you are an artist and are interested in participating, or would like some more information on this Exhibition, please go to the 2011 Trees for Life Charity Exhibition at http://treesforlifeexhibition.blogspot.com/

    Hope you have a wonderful week!

    Sunday, May 8, 2011

    How to Frame your Prints with Solder

    What a crazy week its been around here!  I've been framing my prints with solder.  If you have ever had any experience with doing stained glass I am sure you would know all about this technique.  I have never done stained glass before I began framing my prints like this, so this was all new to me when I first started.   The following is a step by step instruction on how you can do it too.

    Years ago I was asked by a wonderful lady and shop owner, Wendy Smith if I would be interested in displaying my prints in this way.  She helped me get started and have me a rundown on how to do it all.  Every spring, she places an order for them from me for her shop, Glass Artisans Studio and Gallery.  Her shop is completely hand crafted glass items made entirely in Atlantic Canada.  If you happen to be passing by on the Cabot Trail, it is an absolute must see gallery.

    To get started, you would need the following:


    • a print of your artwork or something you wish to frame.
    • matboard
    • 2 pieces of glass, same size as the matboard
    • copper foil tape
    • flux
    • solder (I prefer lead-free for health reasons, though I hear it is trickier to work with)
    • soldering iron
    • wire
    • baking soda and dishwashing liquid
    • stained glass patina
    • wax for stained glass
    The items in italics are stained glass products and can be found in a shop that sells stained glass supplies.


    So, here is how I do it.  First of all I take my image, which is approximately 3 x 5 inches and glue it on a piece of 5 x 7 matboard.  I sign it and put the title on the bottom.  I also leave a white edge around the image.


    I also glue my bio on the back.


    I then sandwich the mat board/image between two pieces of 5 x 7 glass, one on the front, the other on the back.


    Tape the whole thing together with copper foil tape.  I  use 1/2 inch wide tape. 

    Solder will bind with the copper and not the glass, so where you put your tape is where the frame will be.  It is important that the tape is straight.  This will be your frame.

    I start off by taping the sides.  I line the glass/image sandwich up right in the middle of the tape.  Go around all 4 sides.  It is important to burnish this edge by rubbing firmly to make sure it sticks firmly.


     Once the outer edge is stuck on good, gently push the sides down to the front and back of the picture.  When you get to the corner, fold it as if you are wrapping a present as shown below.


    Once the picture is taped, it is really important to
    burnish the tape.  I use the back of my thumbnail and go over the entire taped area.  This ensures the tape will not lift during heating with the soldering iron or allow any flux, cleaner, patina or wax that will be used later to get underneath the foil.


    Almost time to add solder!
    I pour some of the flux off and with a brush, I paint the entire copper foil area.  I find it works best if I give it a little scrub as I am painting it on. 

    I use a gel flux that is smokeless and odorless, which really helps.  Sometimes the fumes can be strong when the heat hits it, so make sure you have good ventilation while you are doing the soldering.

    I'd also like to note that the gel flux isn't as watery as most types of flux I've used in the past and doesn't seep under the tape and make a mess of my print!


    Now the fun begins!
    The soldering iron is VERY HOT, so be careful.  It just need to touch the solder and the solder will melt right on to your copper foil. 


    Adding solder to the top of the frame.  I usually do all four of the side edges, then all four sides on the front.  I do the four sides on the back last, though it does not really matter what order you do them in.


    I've used this same old can for my "support" since I started doing this 5 years ago.  I don't think I'll be eating what's inside that anytime soon!  It's pretty gross looking up close.
    Here I just keep the iron on the solder the whole way across.  If there are any lumps or bumps, and usually for me there are, I just go over the area again at a smooth pace.  I don't need to add any more solder from the spool, and the solder is already quite hot so it is just a matter of moving the iron across that one line of the "frame".


    Once all side are completed it is time to add the wire to the back.  Fold the wire about an inch or so from the end and add some flux.  Take a dab of solder and carefully solder the wire to the frame. 


    Bring the other end of wire to the opposite side and bend it at 90o where you want it to end.  Then cut it with wirecutters approximately one inch from the bend.  Solder it on as you did the other side.


    Okay, now that the soldering is all done, the flux needs to be washed off. You can buy commercial products that are designed for cleaning the flux or use a mixture of water, baking soda and dishwashing liquid.  This will neutralize the flux.  Wet a cloth with the mixture and wipe down your picture.  Just make sure your cloth isn't too wet, you don't want water seeping under your tape.  I have had way too many ruined prints because of this!

    Once the flux is washed off, you can add a patina.  Brush it on and wipe off.  Simple as that. 

    Follow up with wax.  Put the wax on the frame and glass.  Let it dry and buff it off.  Gives it a brilliant shine.


     And Voila! The final product!  Any questions or suggestions, please feel free to leave them here in the comment section.  I'd love to hear from you!  Oh, and let me know if you've tried it!

    Thursday, May 5, 2011

    Pierscape...Week Long Arts Festival!

    How does a week long festival of fine art, drama, poetry, Italian food, creative writing, sculpture sound to you?  It has been an annual event here in Sydney, NS since 1997 and never disappoints.


    The Whitney Pier Society for the Arts is gearing up for another great festival  
    May 9th - 14th, 2011

    I spent most of last weekend and early part of the week getting some paintings ready for this wonderful event. Here are the four  I submitted, they are all 5x7 inches:
    Pear


    Mixed Media
    watercolor, watercolor pencil, acrylic
    5x7 inches
    Live Simply
    Be Happy

    Three Amigos


    Live Simply
    Watercolor 
    5x7 inches


    Be Happy
    Watercolor with collage
    5 x 7 inches


    Three Amigos
    Watercolor
    5x7 inches


    I was going like a mad woman trying to get the paintings finished and finally framed, but in the end I was happy with the result.  And hey, I wouldn't complain if I sold one or two :-)

    I always enjoy  Pierscape.  And opening night is a real treat.  Here is an example how things looked at the fine art display from last years event.   (And if you look closely, you can see one of my crow paintings.  It's kind of like playing Where's Waldo. )


    Everyone is invited to the Opening ceremony at 7:30pm on Monday, May 9th in the Whitney Pier Memorial Junior High (199 Jamieson St. Sydney, NS).
    There will be a large exhibit of fine art, as well as music and refreshments.
    Dr. Elizabeth Beaton will be  the special guest and key note speaker.
     

    You can even join in the festivities by participating in one of these amazing workshops, too!  

      Ukrainian Egg Decoration with Rev. Dusanowskyj 
      Unveil Your Creativity with Onni Nordman
       
      If you are interested in the workshops, or if you are just plain interested and want to know more, you can check out their website here, at www.pierscape.ca 
       
    Related Posts Plugin for WordPress, Blogger...