Artist trading cards (ATCs) are miniature works of art! They are about the same size as modern baseball cards, or 2 ½ X 3 ½ inches (63 mm X 89 mm). They are small enough to fit inside standard card-collector pockets, sleeves or sheets and they can be created with any material imaginable. Some cards are produced in editions (a limited number of the same card), some in series (a set of cards with a unifying theme), and some are singular originals.
An offshoot of ATCs are the "Art Cards, Editions and Originals" also known as ACEO. ACEOs originated when some artists began to create cards to sell, and/or trading among themselves.
Here is an example of how popular these little cards have become...
This week on August 11, the Confederation Center of the Arts in Charlottetown, Prince Edward Island is holding it's fifth annual Artist Trading Card event! It's Fifth! There are more than 60 artists from all over the maritimes participating! There will be local artists to Prince Edward Island as well as artists from New Brunswick, Nova Scotia, Newfoundland and Labrador and Ontario.
The event starts at 7 p.m. in Memorial Hall as part of the Thursday in the Gallery series. This year's submissions include a wide variety of techniques including linocuts, watercolours, collage, and mixed media creations.
I am not able to attend, but I'll give you a sneak peek of the card I submitted:
It's called "I Believe, I Wish" The original painting is watercolor and acrylic on 140 lb watercolor paper. I love how this image turned out. I submitted signed, limited edition prints of this painting. What do you think?
I have created several ATC and ACEOs and they do seem to be quite popular. If you are an artist, leave a comment, and share your experiences with Art Trading Cards and ACEO's. Do you find they are popular as well? And do you sell them or use them primarily for trading with other artists? Do you use prints or originals or both?
Wednesday, August 10, 2011
Tuesday, August 2, 2011
Who Loves French?
Who doesn't love French? The romance of the language...the gorgeous countryside of France or the incredible beauty of Paris, famous for its history, romance and art?
I love the language, and it's been on my bucket list for a few years now to learn it fluently. I have been taking weekly classes for two years now, and I've come a long way, but still have tons to learn. I love getting out once a week to get my French fix.
French class is finished for the summer and will start up again in the fall. So to honour my love for French, I have decided to relist my Valentine ACEOs on Etsy ♥ If you'd like to have a look at the listing just click on the image :-)
Do you love French? Leave me a comment!
I love the language, and it's been on my bucket list for a few years now to learn it fluently. I have been taking weekly classes for two years now, and I've come a long way, but still have tons to learn. I love getting out once a week to get my French fix.
French class is finished for the summer and will start up again in the fall. So to honour my love for French, I have decided to relist my Valentine ACEOs on Etsy ♥ If you'd like to have a look at the listing just click on the image :-)
Do you love French? Leave me a comment!
Monday, July 25, 2011
I Love These Fossilized Shells!
Ammonite shells again...my visit to the Smithsonian Museum of Natural History has inspired me to paint these gorgeous shells. Not only are they incredibly beautiful, they also resonate with me on a more meaningful level.
These ancient shells are call ammonites. They look very much like shelled nautiloids but are actually more closely related to octopus, squid and cuttlefish. Very similar to a nautilus, however, they grow and move into a larger chamber which has grown ahead of it. It adds newer and larger chambers to the open end of the coil and grows like this until it has reached maturity.
Isn't that just like life? We are constantly building and growing on what we have already know based on what we have learned and what we have experienced. Sometimes it might take a couple of tries to get it right, and there may be a few bumps along the way, but eventually we do learn and grow :-)
And here is my latest painting. It is a mixed media and incorporates collage. Let me know what you think. I hope you love it.
| 8 x 8 x 1.5 inches |
Thursday, July 21, 2011
Ancient Shells and Building on what we Already Know
One of my favorite places my family and I went to on our recent vacation was the Museum of Natural History in Washington DC. It was the first of the Smithsonian museums that we were able to see, and I was in absolute awe the minute I walked in the door with my husband and my two kids.
I was so excited, I started taking pictures right away. I was taking as much in as my little brain could handle, reading all the little information cards and doing my best to commit the information to memory.
"Look, kids...this is a blah, blah, blah! And look at this, isn't that interesting?"
But I didn't want to miss anything and I was determined to take it all in! I loved these ancient fossilized shells! They were so beautiful!
The artist in my was creating mixed media collages in my head. Here is a mixed media painting that I created this week. It is 8 x 8 x 1.5 inches on gallery wrapped canvas.
These ancient shells are call ammonites. They look very much like shelled nautiloids but are actually more closely related to octopus, squid and cuttlefish. Very similar to a nautilus, however, they grow and move into a larger chamber which has grown ahead of it. It adds newer and larger chambers to the open end of the coil and grows like this until it has reached maturity.
I love how David Weber of Thou relates the nautilus shell to life
And therein is the story of everything else. A baby is born with an infant’s consciousness: everything, beginning with Mom, is an extension of itself. As a 1 to 2 year, the toddler begins to understand the distinct nature of itself. The second level of consciousness supercedes the first, even as it is wholly built upon it. Cognitive abilities continue to increase as the child grows older: from the manipulation of its environment to the complete separation of its personality from parents and others, to an always heightening understanding of cause and effect, then adopting a social self, a critical self, a self-critical self. Each point in the process is built upon the previous one, and is always a part of the previous state of consciousness and understanding
The whole is a result of previous and lesser sized parts, one built upon the other. No part loses its significance, even as its specific usefulness ha been transcended.
An acorn becomes a shoot, becomes a sapling, becomes a young tree, becomes a mature oak. Everything about the acorn is still a part of the great oak tree, but has been transformed and functions as a much larger and much more complex part of the tree’s wholeness.
Saturday, July 16, 2011
Here's My Tree!
Phew! I'm finally back from an amazing vacation with my wonderful family. Sorry I've been slow to keep this blog updated! We were busy travelling across Eastern Canada and the United States. What a fantastic trip! So many sites, so many museums (including the National Gallery of Art!) I have came back refreshed and with tons of great ideas for posts, so please stay tuned!
Right now, though, I'd like to update you on this project...
My last post was all about the Trees for Life Charity Exhibition..a wonderful fundraiser started by Trevor Jones. He has asked artists from Twitter and Facebook to donate a piece of artwork, preferably of a nature inspired theme to raise funds for Trees for Life, a fantastic charity supporting the growth of the
I decided to do a watercolor painting of some trees at my favourite trail...I always find it so incredibly peaceful and quiet in these woods. There is nothing like hitting the trails at a run or a peaceful walk to clear you mind.
I started with this sketch...
The color dried a fair bit lighter as you can see in the following pic. When it was completely dry, I began adding some shadow to create a bit of value. Because I was working on a dry surface, the dark color stayed put and did not mingle with the other colors already in place.
Getting closer to being finished here...
A bit more work on the detail in the roots and earth along with some finishing touches and Voila!
Done!
On Monday, this 6x9 inch painting will be shipped off to join the other paintings in this exhibit. Please have a look at some of these amazing paintings go to: http://treesforlifeexhibition.blogspot.com
Monday, May 23, 2011
Trees for Life Charity Exhibition
I'd like to tell you all about an amazing charity project by Trevor Jones. Trevor is an amazingly talented artist who is originally from Canada and currently living in Edinburgh, Scotland. He has a passion for trees that can be seen in his artwork and this passion is what has set the stage for his latest and greatest project.
Trevor says his original thought was to donate a percentage of sales of the artwork to Trees for Life (a fantastic charity supporting the growth of the Caledonian Forest ). After more thought he realized he could make much more impact for his cause with the help of social media Twitter and Facebook.
He has asked artists from Twitter and Facebook to donate a piece of artwork, preferably of a nature inspired theme. The size must be approximately 6 x 9 inches (postcard size). Each piece will sell for £45. Trevor will have them professionally card mounted and backed.
The exhibition and sale will occur November 1-13. Paintings must be submitted by July 31.
This event has quickly grown into a huge international event with over 100 artists from 15 different countries participating!
I am thrilled to be participating in this event. Not only is it exciting to participate in an international event, it is an absolutely fantastic cause.
I have been totally focussed on finishing my print order, and I should have it finished this week...woo hoo! I've been painting in my head even though I haven't been able to get my thoughts on paper just yet. I have so many mental images I am working through right now. I absolutely cannot wait to begin working on this project! I'll have to get it finished and mailed by early June, I figure, to make the July 31 deadline. That will be another post!
If you are an artist and are interested in participating, or would like some more information on this Exhibition, please go to the 2011 Trees for Life Charity Exhibition at http://treesforlifeexhibition.blogspot.com/
Hope you have a wonderful week!
"It really is unsettling to know that over half the world’s forests have been destroyed by humans and as I mentioned in my blog only 1% of the original Caledonian forests in Scotland are left today. That’s really depressing and quite scary!" Trevor Jones
We all know the importance of trees. Not only are the beautiful and give a sense of peace and joy, they are also play a major role in controlling the Earth's weather patterns. Here is an interesting top 10 list I found of the top ten reasons why we need trees from Lungs of the Earth at
There is a sense of urgency needed to address this situation. The United Nations and the scientific community both recognize this,
We all know the importance of trees. Not only are the beautiful and give a sense of peace and joy, they are also play a major role in controlling the Earth's weather patterns. Here is an interesting top 10 list I found of the top ten reasons why we need trees from Lungs of the Earth at
Top 10 Reasons We Need Trees
Source: USDA Forest Service
1. Trees help purify the air we breathe by absorbing pollutants.
2. Trees increase property values and improve the tax base in communities.
3. Trees improve neighborhood appeal, attract businesses, shoppers and homeowners.
4. Trees cool our cities and towns by reducing heat generated by buildings and paved surfaces.
5. Tree shade, properly placed, can save an average household up to $250 annually in energy costs.
6. Trees reduce the amount of pollutants in sewer systems, saving communities millions of dollars in water treatment costs.
7. Trees soften harsh building lines and large expanses of pavement, making urban environments much more pleasant.
8. Trees provide habitat for birds and other wildlife, maintaining a balance with nature even in urban areas.
9. Trees reduce the amount of water-borne pollutants that reach streams and rivers.
10. Trees reduce levels of domestic violence and foster safer, more sociable neighborhood environments.
There is a sense of urgency needed to address this situation. The United Nations and the scientific community both recognize this,
which is the key reason why 2011 has been declared the International Year of Forests.
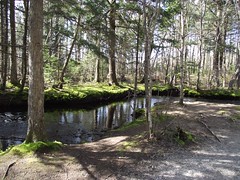
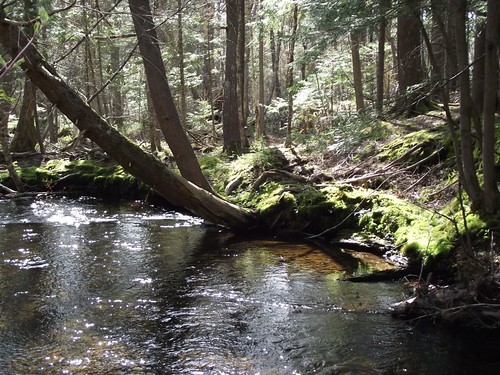
| Baille Ard Trails, May 2011 |
He has asked artists from Twitter and Facebook to donate a piece of artwork, preferably of a nature inspired theme. The size must be approximately 6 x 9 inches (postcard size). Each piece will sell for £45. Trevor will have them professionally card mounted and backed.
The exhibition and sale will occur November 1-13. Paintings must be submitted by July 31.
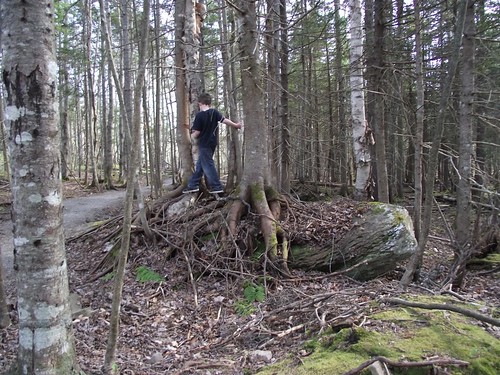
| Trees can be extremely tenacious! Check out these roots! |
I am thrilled to be participating in this event. Not only is it exciting to participate in an international event, it is an absolutely fantastic cause.
| Enjoying some family time in the woods |
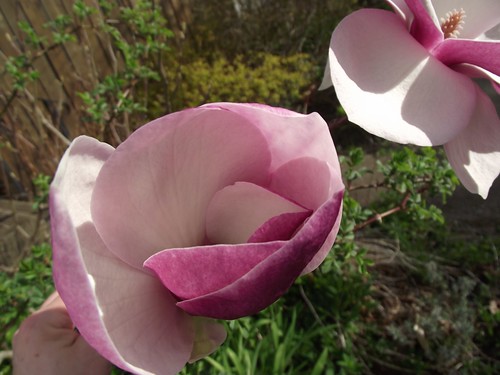
| My Magnolia Tree bloomed! |
If you are an artist and are interested in participating, or would like some more information on this Exhibition, please go to the 2011 Trees for Life Charity Exhibition at http://treesforlifeexhibition.blogspot.com/
Hope you have a wonderful week!
Sunday, May 8, 2011
How to Frame your Prints with Solder
What a crazy week its been around here! I've been framing my prints with solder. If you have ever had any experience with doing stained glass I am sure you would know all about this technique. I have never done stained glass before I began framing my prints like this, so this was all new to me when I first started. The following is a step by step instruction on how you can do it too.
Years ago I was asked by a wonderful lady and shop owner, Wendy Smith if I would be interested in displaying my prints in this way. She helped me get started and have me a rundown on how to do it all. Every spring, she places an order for them from me for her shop, Glass Artisans Studio and Gallery. Her shop is completely hand crafted glass items made entirely in Atlantic Canada. If you happen to be passing by on the Cabot Trail, it is an absolute must see gallery.
To get started, you would need the following:
So, here is how I do it. First of all I take my image, which is approximately 3 x 5 inches and glue it on a piece of 5 x 7 matboard. I sign it and put the title on the bottom. I also leave a white edge around the image.
I also glue my bio on the back.
I then sandwich the mat board/image between two pieces of 5 x 7 glass, one on the front, the other on the back.
Tape the whole thing together with copper foil tape. I use 1/2 inch wide tape.
Solder will bind with the copper and not the glass, so where you put your tape is where the frame will be. It is important that the tape is straight. This will be your frame.
I start off by taping the sides. I line the glass/image sandwich up right in the middle of the tape. Go around all 4 sides. It is important to burnish this edge by rubbing firmly to make sure it sticks firmly.
Once the outer edge is stuck on good, gently push the sides down to the front and back of the picture. When you get to the corner, fold it as if you are wrapping a present as shown below.
Once the picture is taped, it is really important to
burnish the tape. I use the back of my thumbnail and go over the entire taped area. This ensures the tape will not lift during heating with the soldering iron or allow any flux, cleaner, patina or wax that will be used later to get underneath the foil.
Almost time to add solder!
I pour some of the flux off and with a brush, I paint the entire copper foil area. I find it works best if I give it a little scrub as I am painting it on.
I use a gel flux that is smokeless and odorless, which really helps. Sometimes the fumes can be strong when the heat hits it, so make sure you have good ventilation while you are doing the soldering.
I'd also like to note that the gel flux isn't as watery as most types of flux I've used in the past and doesn't seep under the tape and make a mess of my print!
Now the fun begins!
The soldering iron is VERY HOT, so be careful. It just need to touch the solder and the solder will melt right on to your copper foil.
Adding solder to the top of the frame. I usually do all four of the side edges, then all four sides on the front. I do the four sides on the back last, though it does not really matter what order you do them in.
I've used this same old can for my "support" since I started doing this 5 years ago. I don't think I'll be eating what's inside that anytime soon! It's pretty gross looking up close.
Here I just keep the iron on the solder the whole way across. If there are any lumps or bumps, and usually for me there are, I just go over the area again at a smooth pace. I don't need to add any more solder from the spool, and the solder is already quite hot so it is just a matter of moving the iron across that one line of the "frame".
Once all side are completed it is time to add the wire to the back. Fold the wire about an inch or so from the end and add some flux. Take a dab of solder and carefully solder the wire to the frame.
Bring the other end of wire to the opposite side and bend it at 90o where you want it to end. Then cut it with wirecutters approximately one inch from the bend. Solder it on as you did the other side.
Okay, now that the soldering is all done, the flux needs to be washed off. You can buy commercial products that are designed for cleaning the flux or use a mixture of water, baking soda and dishwashing liquid. This will neutralize the flux. Wet a cloth with the mixture and wipe down your picture. Just make sure your cloth isn't too wet, you don't want water seeping under your tape. I have had way too many ruined prints because of this!
Once the flux is washed off, you can add a patina. Brush it on and wipe off. Simple as that.
Follow up with wax. Put the wax on the frame and glass. Let it dry and buff it off. Gives it a brilliant shine.
And Voila! The final product! Any questions or suggestions, please feel free to leave them here in the comment section. I'd love to hear from you! Oh, and let me know if you've tried it!
Years ago I was asked by a wonderful lady and shop owner, Wendy Smith if I would be interested in displaying my prints in this way. She helped me get started and have me a rundown on how to do it all. Every spring, she places an order for them from me for her shop, Glass Artisans Studio and Gallery. Her shop is completely hand crafted glass items made entirely in Atlantic Canada. If you happen to be passing by on the Cabot Trail, it is an absolute must see gallery.
To get started, you would need the following:
- a print of your artwork or something you wish to frame.
- matboard
- 2 pieces of glass, same size as the matboard
- copper foil tape
- flux
- solder (I prefer lead-free for health reasons, though I hear it is trickier to work with)
- soldering iron
- wire
- baking soda and dishwashing liquid
- stained glass patina
- wax for stained glass
So, here is how I do it. First of all I take my image, which is approximately 3 x 5 inches and glue it on a piece of 5 x 7 matboard. I sign it and put the title on the bottom. I also leave a white edge around the image.
I also glue my bio on the back.
I then sandwich the mat board/image between two pieces of 5 x 7 glass, one on the front, the other on the back.
Tape the whole thing together with copper foil tape. I use 1/2 inch wide tape.
Solder will bind with the copper and not the glass, so where you put your tape is where the frame will be. It is important that the tape is straight. This will be your frame.
I start off by taping the sides. I line the glass/image sandwich up right in the middle of the tape. Go around all 4 sides. It is important to burnish this edge by rubbing firmly to make sure it sticks firmly.
Once the outer edge is stuck on good, gently push the sides down to the front and back of the picture. When you get to the corner, fold it as if you are wrapping a present as shown below.
Once the picture is taped, it is really important to
burnish the tape. I use the back of my thumbnail and go over the entire taped area. This ensures the tape will not lift during heating with the soldering iron or allow any flux, cleaner, patina or wax that will be used later to get underneath the foil.
Almost time to add solder!
I pour some of the flux off and with a brush, I paint the entire copper foil area. I find it works best if I give it a little scrub as I am painting it on.
I use a gel flux that is smokeless and odorless, which really helps. Sometimes the fumes can be strong when the heat hits it, so make sure you have good ventilation while you are doing the soldering.
I'd also like to note that the gel flux isn't as watery as most types of flux I've used in the past and doesn't seep under the tape and make a mess of my print!
Now the fun begins!
The soldering iron is VERY HOT, so be careful. It just need to touch the solder and the solder will melt right on to your copper foil.
Adding solder to the top of the frame. I usually do all four of the side edges, then all four sides on the front. I do the four sides on the back last, though it does not really matter what order you do them in.
I've used this same old can for my "support" since I started doing this 5 years ago. I don't think I'll be eating what's inside that anytime soon! It's pretty gross looking up close.
Here I just keep the iron on the solder the whole way across. If there are any lumps or bumps, and usually for me there are, I just go over the area again at a smooth pace. I don't need to add any more solder from the spool, and the solder is already quite hot so it is just a matter of moving the iron across that one line of the "frame".
Once all side are completed it is time to add the wire to the back. Fold the wire about an inch or so from the end and add some flux. Take a dab of solder and carefully solder the wire to the frame.
Bring the other end of wire to the opposite side and bend it at 90o where you want it to end. Then cut it with wirecutters approximately one inch from the bend. Solder it on as you did the other side.
Okay, now that the soldering is all done, the flux needs to be washed off. You can buy commercial products that are designed for cleaning the flux or use a mixture of water, baking soda and dishwashing liquid. This will neutralize the flux. Wet a cloth with the mixture and wipe down your picture. Just make sure your cloth isn't too wet, you don't want water seeping under your tape. I have had way too many ruined prints because of this!
Once the flux is washed off, you can add a patina. Brush it on and wipe off. Simple as that.
Follow up with wax. Put the wax on the frame and glass. Let it dry and buff it off. Gives it a brilliant shine.
And Voila! The final product! Any questions or suggestions, please feel free to leave them here in the comment section. I'd love to hear from you! Oh, and let me know if you've tried it!
Subscribe to:
Posts (Atom)